Tuesday, March 8, 2011

What I've Been Doing

So, despite my absence from the blogging world I've been keeping up with my passion for baking and cooking. Part of my apparent issue with consistent updates is my frustration with my very basic digital camera, and my inability to make it take good pictures regularly.
One of the cool challenges I had recently (that was not photographed) was to make a vegan dessert for a very belated Christmas party in February. I had never before attempted making a vegan dessert, and was definitely not a fan of them. The lack of butter, cream, or anything that really adds moisture to a delicious dessert, is not allowed and therefore not on my agenda. So, this was a real challenge.

After trying a recipe of Angela's at Oh She Glows, I found that my previous judgement still stood and I revamped the recipe to make it easier to consume for both vegans and animal eaters alike.

Something I found very intriguing was the avocado base of Angela's Chilled Double Chocolate Torte, and so I kept that and rather than making the chocolate vegan cake again (which came out extremely dry) I processed some vegan chocolate ginger cookies into small crumbs, combined them with some almond milk, and pressed a crust into the bottom of the cake pan, and in between two layers of the torte filling (think ice cream cake). I also added another ounce of melted chocolate to the filling to make the avocado taste less conspicuous. I was extremely happy with this attempt, and it made the cut for the party. No one could even tell it was vegan!

Anyway, though I didn't take any pictures of my vegan challenge, here is a photo journal of the past few months:


Research

It's apples and oranges.

"I'm sorry"

Parmesan Cauliflower Cake

A reinvention of Ina's pesto fish dish

Mmmm

Pumpkin Chocolate Chip. These are dangerous.

Salted Peanut Caramel Cups

Peanut butter cookies filled with salted peanut caramel and drizzled with chocolate. After these babies my office literally demanded more treats.

Candied ginger. Time consuming, but a great Christmas gift and snack to munch on. Also a great addition to apple pie.

About to cook down the cherries for winter storage.


Snickerdoodles always warm my heart.


I think peanut brittle is the hardest thing I've ever made, but homemade peanut brittle is SO much better than store bought.

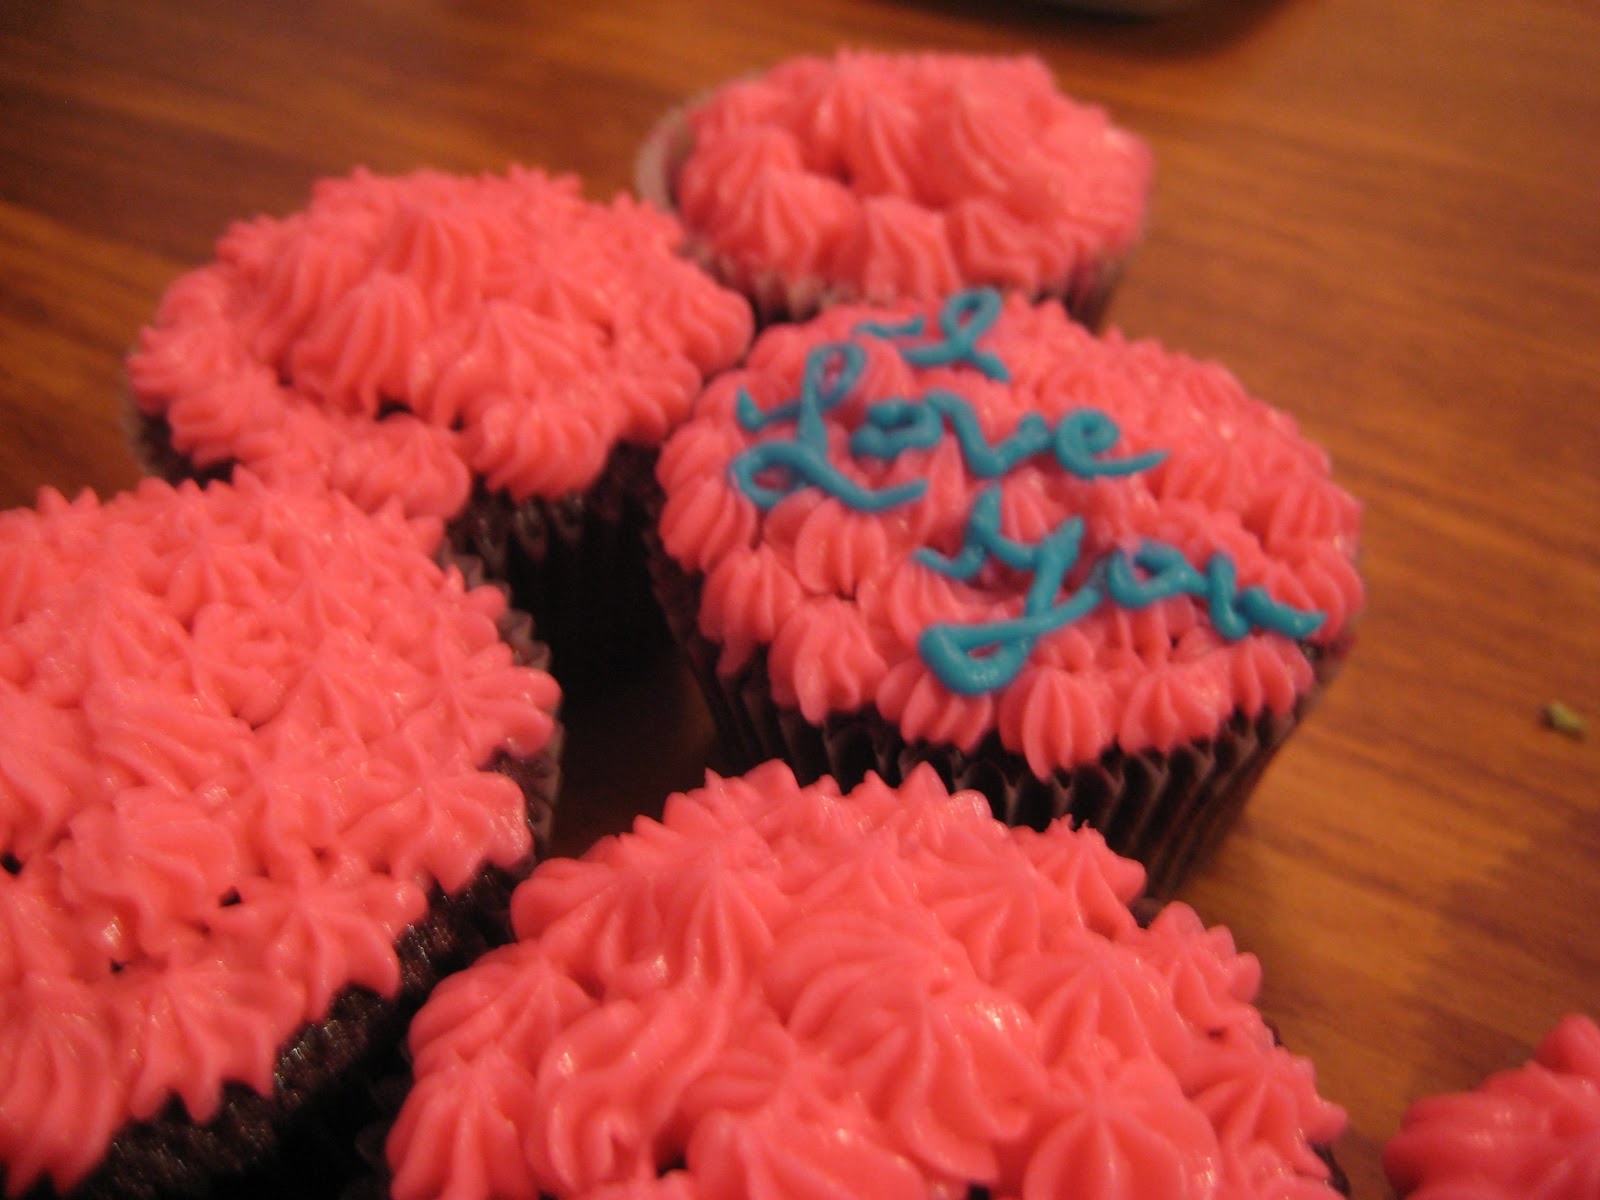
I'm not as good as making and thinking up lovely things to say for Valentine's Day, so I just made a giant heart out of cupcakes.
 
If you're interested in any of these recipes let me know and I will post them!

Thursday, March 3, 2011

Daring Bakers' Challenge: Panna Cotta and Florentines

The February 2011 Daring Bakers’ challenge was hosted by Mallory from A Sofa in the Kitchen. She chose to challenge everyone to make Panna Cotta from a Giada De Laurentiis recipe and Nestle Florentine Cookies.

I was actually dreading the process of making Panna Cotta. Not for any good reason because I love eating creamy desserts like Creme Brulee, but I think I previously had a severe mental block about making them myself.

But I do have to say that this dessert was incredible, and a definate option for dinner parties.

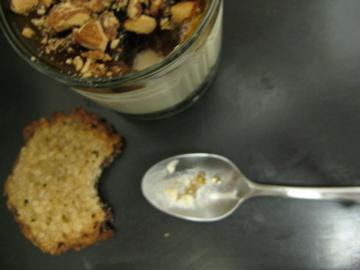
Panna Cotta with Coffee Gelee
serves 4-6 depending on dish size

Ingredients:

1 cup whole milk
1 tablespoon/1 packet unflavored powdered gelatin
3 cups heavy cream
1/3 cup honey
1 tablespoon granulated sugar
1/8 teaspoon kosher salt

Mise en place: Place medium pot or saucepan (preferably heavy bottomed) in fridge to cool. Measure out and prep all ingredients.

1. Pour milk into chilled pot and sprinkle gelatin evenly* over surface. Let stand for about 5 minutes to allow gelatin to soften.

2. Place milk (in pot) over medium heat until the mixture is hot without boiling (this will take around 5-7 minutes).

3. Whisk in cream, honey, sugar, and salt. Continue to heat mixture without boiling until sugar and honey melts, stir occasionally.

4. Remove from heat and cool mixture for a few minutes. Pour into ramekin or glass and refigerate for at least 6 hours.**


Coffee Gelee

Ingredients:

2 cups brewed coffee of your choice
1/4 cup hot water
2 tablespoons cold water
1/2 cup granulated sugar
1 1/2 teaspoons unflavored powdered gelatin
2 teaspoons vanilla extract

1. Mix hot water and sugar in saucepan over heat. Bring to a boil and stir until sugar is dissolved.

2. Sprinkle gelatin evenly over cold water and let it sit for 2 minutes.*

3. Stir the coffee, sugar water, and vanilla into small bowl. Stir in gelatin mixture until dissolved and allow to cool to room temperature before adding to panna cotta (or it will melt).

Add additional toppings if desired.


Florentines
Makes about 20 assembled cookies

These are different from the almond Florentines I usually make, but these are very very yummy and a bit more traditional.

Ingredients:

2/3 cup/5.3 oz unsalted butter
2 cups quick oats
1 cup granulated sugar
2/3 cup all-purpose flour
1/4 dark corn syrup
1/4 cup whole milk
1 teaspoon vanilla extract
1/8 teaspoon kosher salt
4-5 oz chocolate of your choice (I used Ghiradelli's 60% dark)

1. Preheat oven to 375 degrees and cover baking sheet with parchment paper.

2. Melt butter in medium saucepan, don't move away from stove or butter might burn.

3. Add oats, sugar, flour, corn syrup, milk, vanilla, and salt. Mix until combined.

4. Drop an even tablespoon of dough, 3 inches apart, on the prepared baking sheet. Flatten slightly with the back of a spoon. I found that anything that measured more than a tablespoon ended up being too big.

5. Bake in pre-heated oven 6-10 minutes until cookies are golden brown. This will depend on your oven. Cool cookies for about 15 minutes on pan, then remove to rack to cool completely.

6. While cookies are cooling, melt your chosen chocolate in a double boiler. Match cookies up according to size and spread melted chocolate to flat side of one cookie. Sandwich it, and let it set!

These are seriously addicting.


*If gelatin is not sprinkled evenly, it may result in clumping in the finished product
**If you wish to layer panna cotta and gelee, you do have to refrigerate 6 hours after each layer is added

Wednesday, December 15, 2010

Bourbon Balls


Or Reindeer balls as Tyrone festively calls them. These are no bake, and a Christmas classic dating back to the 30's (I think). They will definitely be a tradition in the Baker-Barnett household in the future!

Reason to always sift your confectioners' sugar
Also, this recipe makes me realize how much of an appliance crush I have on my food processor. Without it, I would have spent an hour or more crushing vanilla wafers for this recipe.


The original recipe stated that you could simply roll the mixture into balls, but I found that pinching it together to make it stick, then shaping into balls was more effective.


Gimme some sugar!


These were so good...Tyrone and I had to test a few of them. ;)

Bourbon Balls
Adapted from The Joy of Cooking
25-50 balls depending on size

Ingredients:

1 1/2 cups confectioners' sugar, divided
2 tablespoons unsweetened cocoa powder
1/4 cup bourbon or dark rum
2 tablespoons light corn syrup
2 1/2 cups vanilla wafer crumbs
1 cup coarsely chopped pecans

Also needed: fluted candy cups measuring 1-1.25 inches

1) Sift 1 cup confectioners' sugar and cocoa powder together in a medium bowl.

2) Mix together bourbon and corn syrup with a wooden spoon, and mix gradually in sugar mix.

3) Combine vanilla wafer crumbs and pecans crumbs and stir into cocoa mixture with wooden spoon.

4) Pinch mixture together to get it to stick, then roll into balls. Roll in sugar(1/2 cup confectioners') and place in fluted candy cup.

Store in between layers of wax paper, keeps for 3 weeks.

Sunday, December 12, 2010

Salted Butter Caramels

So, this is the start of a candy makin' journey. I decided to make candy for gifts this year, rather than buy gifts. It's cheaper, and less agonizing.


Salted butter caramels are incredible on their own, but even better when they are made by you and given to your friends and family! And really, it's not that hard. It just takes patience, some time, and the ability to stay in the room and watch the caramel cook. This caramel gets very very hot (I have some burns to prove it) so it must be watched at all times.


 I would also like to give a shout out to my friend Kirsten, who assisted in letting me know wax paper works very well for wrappers. Cellophane wrap is IMPOSSIBLE to find in NYC.


Salted Butter Caramels
Adapted, barely, from David Lebovitz
30-40 pieces depending on desired size

3/4 cup heavy cream
1/2 teaspoon vanilla extract
3/4 teaspoon sea salt
1/2 cup corn syrup
1 cup sugar
4 tablespoons salted butter, cubed and at room temperature

Tools:
candy thermometer
wax paper

1. Line a 9 inch loaf pan with tin foil, making the inside as smooth as possible. This will provide the shape for the caramels, and you don't want creases all over them! Spray the foil with cooking spray, or lightly grease with butter.

2. Mix cream, vanilla, and 1/2 teaspoon of sea salt in a small saucepan, and heat until it begins to boil. Remove from heat and keep warm during caramel process by covering.

3. Over medium heat, combine sugar and corn syrup in a heavy bottomed saucepan, stirring gently to insure the sugar dissolves. Fit saucepan with a candy thermometer and cook until the syrup reaches 310 degrees. To get an accurate reading of the syrup, the bulb of the thermometer must be fully submerged in the syrup so tilt the pan if necessary.

4. Once the syrup reaches 310 degrees, turn off the heat and whisk in the heated cream mixture until smooth. It will bubble and froth at first, so be careful and gentle.

5. Turn the heat back on and cook mixture to 260 degrees.

6. Remove pan from heat and mix in cubed butter, until all the chunks are mixed in and smooth. Pour mixture into prepared pan and let cool for 10 minutes.

7. After 10 minutes, sprinkle the remaining sea salt (1/4 teaspoon) over the top of the caramel and cool completely.

8. Once cool, lift out caramel from pan and peel away tin foil. Slice into desired sized pieces with a long, sharp knife. I found the easiest way to do this was to wet the knife with warm water between each cut. Candies can be individually wrapped with wax paper and cellophane, or stored in layers seperated by wax paper. I do recommend individually wrapping them because they tend to stick together. These will keep for 3-4 weeks.

Saturday, December 11, 2010

I'm back! Happy Holidays!!

GOSH it's been busy. New York during the holidays can be cheery, but also a vicious, vicious place. The one really awesome piece of news is that our new neighborhood plays Christmas music in the street all day. Seriously, cool.

So, I am totally broke this year and have decided to spend hours slaving over a hot stove making candy for gifts, rather than buying gifts. It has been quite a blast so far, so stay tuned for upcoming posts on so many delicious treats. Ones that I would recommend you make!

But first, to start off my slew of holiday cheer-filled blog posts, I will start with a picture of

My very first Christmas tree! And yes, my boyfriend decided to put a stuffed monkey as the tree topper. We are classy, yep. Also, I spent hours stringing all that popcorn and those cranberries. So, I think it is a mighty fine tree.

So, with all the baking and candy making that goes on around the holidays, I thought it might be nice to show you a little trick that I like to use.

Don't you hate it when you reach into the cupboard only to discover that you're beloved brown sugar is completely hard? I detest this so much that I make my own brown sugar when I need it!

Brown Sugar

1 cup sugar
1 tablespoon molasses

Mix it with a fork. It will seem like it will never come together. But it will. And now you have nice, fluffy, delicious brown sugar! If you want darker brown sugar, just add more molasses 1 tsp. at a time until you reach the desired coloring.


Tip*
If you want to make a bunch at once to store, place a piece of bread in the container with the brown sugar.

Thursday, October 28, 2010

Daring Baker's Challenge October!

I know, I've been a bad, bad blogger.

It has officially been a month since my last post!

In the past month I have stage managed a theater production through rehearsals and we are now in our closing weekend, I have slept maybe 20 hours total in the last month, got smacked in the head by a metal dolly (I now have a concussion), I and barely baked at all!

Quite an exciting month. And this month's challenge was indeed a challenge since I had -5 hours of extra time, and I had to make donuts without owning a stand mixer!

The October 2010 Daring Bakers challenge was hosted by Lori of Butter Me Up. Lori chose to challenge DBers to make doughnuts. She used several sources for her recipes including Alton Brown, Nancy Silverton, Kate Neumann and Epicurious.

These puppies turned out to be absolutely delicious, and I am very impressed with myself. Especially since the only time I was able to create this little darlin's was when I had a sick day because I broke my head. (For those who may be concerned, don't worry, I'm okay!)


Yeast Doughnuts
15-20 doughnuts depending on size, 15-20 doughnut holes

1 1/2 cups milk
1/3 cup vegetable shortening (butter, margarine, or lard can also be used)
2 packages of active dry yeast
1/3 cup warm water
2 large eggs, beaten
1/4 cup white granualted sugar
1.5 teaspoon table salt
1 teaspoon grated nutmeg
4 2/3 cups All-purpose flour, plus extra for dusting counter
Canola oil

1. Fill bowl with warm water and sprinkle yeast over. Stir just a little to incorporate, then let sit for 5 minutes until foamy.

2. Heat milk in saucepan over medium heat until just warm.

3. Place shortening in a small, heat-proof bowl and pour warm milk over. Milk should be warm enough to melt shortening.

4. Place foaming yeast into a large bowl or bowl of stand mixer, add milk and shortening mix (make sure it has cooled first).

5. Add eggs, sugar, salt, nutmeg, and half the flour and combine with mixer until incorporated, then beat at medium speed until well combined.

6. Add the remaining flour at low speed, then adjust again to medium speed. If you're using a hand mixer, be careful to be gentle and not burn out your motor at this point.

7. If you have a stand mixer, switch to your dough hook and beat for about 2 minutes until dough pulls away from the edges of the bowl. If you dont, like me, use your hands! Roll up those sleeves and have some fun! The dough will be very sticky at first, and I ended up adding about 2 more cups of flour before it was non-sticky enough to detach itself from my hands. Knead flour into dough gently, and remember if you knead too roughly, you will have tough doughnuts.

8. Transfer dough to a well-oiled bowl, cover with a towel or tea cloth, and let rise for about 1 hour. It will double in size.

9. On a well floured surface roll out down to 3/8-inch thick. Cut out dough using a 2 1/2 inch doughnut cutter and 1 inch cutter for center ring. Set pieces on floured baking sheet, cover with towel and allow to rise for 3o minutes.

10. Preheat oil in dutch oven or deep fryer to 365 degrees F.

11. Gently place doughnuts in oil, cook for 40 sec-1 min per side or until golden brown.

12. Transfer to a cooling rack placed in baking pan. Allow to cool 15-20 minutes prior to glazing, if desired.


I just rolled my doughnut holes in confectioners' sugar. yummm.

Chocolate Glaze
recipe from Alton Brown

This makes a ton of glaze, so feel free to halve it.

Ingredients:
1/2 cup unsalted butter
1/4 cup whole milk, warmed
1 tablespoon light corn syrup
2 teaspoons vanilla extract
4 ounces bittersweet chocolate, chopped
2 cups confectioners' sugar, sifted


Combine butter, milk, corn syrup, and vanilla in a medium saucepan over medium heat until butter melts completely. Turn heat to low, add chocolate and whisk until melted. Turn off heat and add confectioners' sugar, whisking until smooth. Use immediately, and let doughnuts set 30 minutes before serving.


Monday, September 27, 2010

My first Daring Bakers' Challenge!

This has been an unusually crazy month for me. I've committed to stage managing my first show in three years, and it's proving to be a lot more work than I remembered.


That being said, it took me a while to find the time, and find the guts to attempt this recipe. I'm cool with the sugar cookies, easy enough. But, I have never proven to be a terribly gifted decorator, so this challenge was definitely a challenge for me.


This is such a great recipe to have under your belt for all those holidays that are coming up. I will definitely be pulling out the royal icing again for Santa's cookies.


The September 2010 Daring Bakers’ challenge was hosted by Mandy of “What the Fruitcake?!” Mandy challenged everyone to make Decorated Sugar Cookies based on recipes from Peggy Porschen and The Joy of Baking.

Another part of the challenge was to decorate cookies with something that speaks "September" to you. I chose lobsters because we took our Labor Day vacation in Maine, and that was a big highlight for me. Lobster is not the same anywhere else, so I always try to eat lots when I'm there.

Basic Sugar Cookies

Ingredients:

1/2 cup plus 6 tablespoons unsalted butter, room temperature
3 cups plus 3 tablespoons All-purpose flour
1 cup superfine sugar
1 large egg, lightly beaten
1 teaspoon vanilla extract

 1) Sift flour into a medium sized bowl and set aside

2) In a large bowl, cream together butter and sugar and add any flavorings you might be using.

3) Add egg and beat until fully incorporated, make sure to scrape down sides of bowl as you go

4) Add the sifted flour slowly while mixing at low speed. A non-sticky dough will form.

5) Bring dough together into a ball and divide equally into 3 pieces.

6) Roll out each portion between parchment paper, then refrigerate for at least 30 minutes.

7) Once chilled, remove parchment paper and place dough on a lightly floured surface. Cut out your shapes with a sharp knife or cookie cutters and place them on parchment lined baking sheets. Once they're arranged, refrigerate cookies for another 30 minutes before baking so they don't lose their shape.

8) Preheat oven to 350 degrees

9) Roll out any extra dough and repeat process.

10) Bake until the cookies are golden, and just starting to turn darker around edges, about 8-15 minutes depending on size of cookies.

11) Cool on baking racks, and do not decorate until completely cool.

TIP: Bake cookies in size groups to avoid burning


Royal Icing

Ingredients:

2 1/2-3 cups confectioner's sugar
2 large egg whites
2 teaspoons lemon juice
1 teaspoon almond extract, or any other flavoring you prefer

1) Beat egg whites and lemon juice until just combined, it will look frothy.
2) Sift confectioner's sugar and add to egg whites, beat on low until smooth.
3) Add any flavoring and mix in.

Royal icing starts to harden when it meets air, so keeping it covered with cling wrap while decorating is highly advised, and will help you avoid lumps.

The best way to utilize royal icing is to create an outline with a thicker consistency of the frosting, wait for the outlines to dry a few minutes, then "flood" the inside with a thinner consistency. The more sugar you add the the frosting, the thicker the consistency.

When "flooding," you apply the thinner frosting inside the outline, and spread the frosting around with a toothpick.

Using a gel or powder food coloring is best, since liquid colorings tend to thin out the frosting.

Piping bags and piping tips sized between 1 and 5 will be the most helpful when decorating.

Friday, September 24, 2010

On a health kick...but I can't give up cheese...

So Tyrone and I have decided to cut back about 75% of our meat eating habits. So far, it's been marvelous! I feel less tired, have more energy, and my general body function is up. He insanely suggested we cut out sugar too, but I gave him this look >:(. And he knew he wouldn't be able to anyway.


It's funny how different life feels when you're not eating as much animal fats. Don't get me wrong, I'm most certainly a bacon girl. But, I can at least TRY to empathize with the vegetarians and vegans out there.


Also, when we were visiting Maine, we stopped by the local farmers' market, and found this lovely brand Lakonia. The specialize in olive oil and salad dressing, and is made in Greece! The woman is Greek and started this business all by herself, and the products are just divine. She also ships nationwide, and really nice olive oil makes a great Christmas gift!

Anyway, this is one of the meals that I found for our new veggie diet, and Tyrone LOVED it! It's super easy, and really yummy.

Spinach and Cheddar Souffle
Adapted from Ina Garten
2-3 servings

Ingredients:
3 tablespoons unsalted butter
1/4 cup finely grated Parmesan cheese, plus extra for sprinkling
3 tablespoons all-purpose flour
1 cup scalded milk
1/4 teaspoon freshly grated nutmeg
Pinch of cayenne pepper
1/2 teaspoon Kosher salt
1/4 teaspoon freshly ground black pepper
4 large egg yolks, room temperature
1/2 cup grated cheddar cheese
1 10 oz. package frozen spinach, defrosted and dried
5 large egg whites, room temperature
1/8 teaspoon cream of tartar

1) Preheat oven to 400 degrees. Grease the inside of a 6-8 cup souffle dish and sprinkle evenly with parmesan (don't be afraid to put too much, this acts as a crust for the souffle).

2) Scald your milk: heat in a saucepan over high heat until tiny bubbles form around edge. It should be at 180 degrees if you want to use your thermometer. Make sure to keep an eye on it so it doesn't scorch.

3) Melt the butter in a small saucepan or double boiler, making sure not to burn it. Once the butter is melted, stir in flour with a wooden spoon and cook for 2 minutes while stirring constantly.

4) Turn off burner, whisk in hot milk, nutmeg, cayenne pepper, salt, and pepper.

5) Turn burner back on to low heat, and cook for about 1 minute whisking constantly. The mixture should get smooth and thick.

6) Turn off burner again, and whisk in egg yolks one at a time. Stir in cheddar, parmesan, and spinach and transfer to a large mixing bowl.

7) In a separate bowl, combine egg whites, cream of tartar, and a pinch of salt. Using the whisk attachment on a mixer, beat on low speed for 1 minute, medium speed for 1 minute, then high speed until they create firm, glossy peaks.

8) Whisk 1/4 of the egg white mixture into cheese mixture to lighten, then fold in the rest of the egg whites with a rubber spatula.

9) Pour into the prepared souffle dish and smooth the top. Draw a large circle on top with spatula to help the souffle rise evenly, and place in the oven. Turn oven down to 375 degrees immediately upon placement and bake for 30-35 minutes until puffed and brown. Don't peek in oven while this is baking or it will affect the rising of the souffle. Serve immediately.

I just ate this with a lovely tossed salad and my Lakonia dressing. Life is good. :)

Saturday, September 18, 2010

I am a Maine girl after all...

So, just to keep up with what this blog was originally intended  for (even if it did turn into a food blog), I TOTALLY ate lobster this summer. Lots of it. I really want some of it right now, actually.

As you know, Tyrone and I traveled to Maine for two seperate weeks. One on his family's farm up north, and one at my family's house in the south by the beach. Both vacations were completely different, and both incredible. I can honestly say I feel ready for this crazy fall schedule I have now entered, and feel O.K. that my next day off is in a month (sort of).

If you don't recall The List, read about it there! That means I completed

14. Eat a whole Maine lobster...each!

15. AND a lobster roll!

Now, for those who don't know, the best place in Maine to get lobster is Bayley's Lobster Pound. It's in Scarborough, ME., right off the ocean. Everything is fresh daily, and they'll even cook those suckers for you  if you're not partial to boiling them yourselves.

Though we definitely were not able to get near to completing the list, we covered all the seasonal stuff. Tyrone and I have decided to continue pursuing this list of ours, who knows, maybe we can finish before the new year. Maybe?


This lobster was cooked and eaten at Tyrone's family's farm in Maine. We even had fresh picked corn with it!


And this is a lovely, lovely lobster roll from Bayley's. I know we didn't get much of our list done, but look at that beach! Look at that lobster roll! Look at that lovely man! Or...his hands anyway. Wild horses couldn't have dragged me away. Or made me run or ride a bike.

(We also ate shrimp rolls right after the lobster rolls. Shhh.)

Tuesday, September 14, 2010

HAPPY BIRTHDAY DAD

So at the beginning of September, Tyrone and I went to Maine for a much needed vacation, and also for my Dad's birthday.

This post is late to say Happy Birthday, but I am so happy I was able to take the time to be there in person this year. My Dad is THE smartest person I know, and never fails to shock me at his infinite knowledge, and also his modesty. And the fact that if and when he reads this, he will laugh at me calling him infinitely knowledgeable.

He is also incredibly positive. I always remember very specifically when he would drive me to school, and it would be raining, he would say "What a beautiful day!" Now, as a kid, I thought he was being crazy. It's raining?! How could it possibly be a beautiful day? Silly Dad.
What a gift that is! To be able to look at the world everyday and say, "What a beautiful day!" This is a lesson I am still learning all the time, and that lots of people never learn.

This has been a rough year financially, so I wasn't able to buy my Dad a nice gift. I decided to make him something extra special in place of a traditional birthday cake.


I know you can't read it, but that says HAPPY BIRTHDAY DAD using....


 Ferraro Rocher Cupcakes! These are basically cupcakes that recreate the Ferraro Rocher candies in cupcake form. I would suggest using a high quality cocoa powder such as Valrhona. It is a bit pricey, but makes a HUGE difference. I know you can also get it at Whole Foods, if you have one near you.

Ferraro Rocher cupcakes
adapted from The Cupcake Project
makes 24 regular cupcakes/ 12 large

Ingredients:
1/2 cup boiling water
6 tablespoons unsweetened cocoa powder
1/4 cup milk
1/2 teaspoon vanilla extract
1 tablespoon hazelnut extract (I couldn't find this ANYWHERE, so order it online!)
1/2 cup unsalted butter, softened
10 tablespoons dark brown sugar
6 tablespoons granulated sugar
2 large eggs, room temperature
1 cup all-purpose flour
1/2 plus 1/8 teaspoon baking soda
1/4 teaspoon kosher salt

1) Preheat oven to 350 degrees. Grease and flour cupcake pans, or use the paper liners.

2) In a medium bowl, whisk boiling water into cocoa until smooth and whisk in milk, vanilla and hazelnut extracts. Set aside.

3) In a large bowl, beat together butter and both sugars until light and fluffy, about 3 minutes. Beat in eggs one at a time, beating after each addition.

4) In a small bowl, sift together flour, baking soda, and salt and add to egg mixture in batches, alternating with cocoa mixture, beginning and ending with flour mix. Make sure to fully incorporate each addition, and stop to scrape down sides of bowl as needed.

5)Fill each wrapper about halfway. These cupcakes rise a lot. This makes just enough batter, so be careful. Bake for about 18 minutes, and cool completely on a wire rack.


Once cupcakes are baked and cooled, make the filling and topping!


Chocolate Hazelnut Filling (Nutella can also be used)

Ingredients:
1 cup heavy cream
1 cup semisweet chocolate chips
2 teaspoons hazelnut extract

1) Bring heavy cream to a boil. Pour over chocolate chips and whisk to melt them. Add extract. Mix with a hand mixer until fluffy.

2) Cut a cone out of the top of each cupcake. Once the filling has cooled, fill each cupcake with 1-2 teaspoons of filling, replacing tops.


Chocolate Hazelnut Ganache topping

Ingredients:
1/2 cup heavy cream
8oz good semisweet chocolate chunks
2 tablespoons light corn syrup (you can leave this out, it just makes the topping glisten more like candy)
2 teaspoons hazelnut extract
1 cup ground hazelnuts, toasted

Bring heavy cream to a boil, and pour over chocolate chunks to melt. Whisk in corn syrup and extract. Add ground hazelnuts to ganache, and spread on top of cupcakes.


Once this is done, decorate as you wish. I used gold sprinkles and gold icing for the lettering.

Oh, and? THEY WERE LISH.

Friday, September 10, 2010

PLEASE DO NOT FEED THE MODELS

This was the name of a shirt I once owned, and wore proudly as a curvy girl.

But, truly, I would really like to feed them.


I work at Lincoln Center for the Performing Arts, and we are the host of Fashion Week this year, and for many years to come. This has resulted in headaches and irritation on my departments part, since our number  seems to be listed as 411 for most of NY.

I do enjoy fashion, and the artistry behind it. But, I can't help but cringe at every model who walks down a runway with popsicle stick legs. As one of my favorite bloggers, Joy the Baker, put it: what woman's thighs DON'T rub together?!


I can't help but wonder if these woman never had mommies who made them birthday cakes, and cookies when they were sad, or taught them how to make breakfast.

Anyway, if I ever have the chance, I would make them a Peach Brown Betty and give them a scoop of vanilla icecream to go along with it. A delicious, buttery dessert that's perfect for a rainy summer night.


Peach Brown Betty
adapted from Joy the Baker
about 8 servings (or 6, if you're us)

Ingredients:
2 heapings cups of peaches, pitted and sliced
7 slices whole wheat bread, cubed
3/4 cup salted butter, cold
1 1/2 cups packed brown sugar
1 teaspoon ground cinnamon

1. Mise en place, which means to prep everything or put "everything in place." So, preheat oven to 375 degrees, pit and slice peaches and set aside, cube all wheat bread, coat 9 or 10-inch pie pan with butter (make sure you do the whole thing).

2. Add 1/3 of the brown sugar to the bottom of the buttered pan. Cover with 1/3 of the sliced peaches, then 1/3 of the cubed bread. Take 1/3 of the cold butter, slice it, and place on top of bread. Repeat this twice more, ending with butter. Sprinkle with a couple tablespoons of water, to moisten.

3. Cover the pie dish with foil, and bake for 40 minutes. Remove foil, and bake for another 5 minutes uncovered to "crisp" it.

4. Allow to cool for about 20 minutes, or until room temperature, then dig in! I always serve this on top of a scoop of vanilla icecream.


NOTE: If you want to get really fancy about it, you can make your own brown sugar. Take one cup granulated sugar, and one tablespoon molasses, and mix mix mix with a fork until there are no clumps left. It's a little time consuming, but really handy if you don't want to run to the store! I really like this method because I make the amount I need, and don't have to worry about my brown sugar hardening on me.


Tuesday, September 7, 2010

Cornmeal Molasses Pancakes

I really love big breakfasts. I always feel better when I start my day with biscuits, pancakes, breakfast sandwiches....you name it. New York looks like a much friendlier place when my tummy is happy. These babies, coupled with some scrambled eggs and a fruit salad, are a definite day-starter, and would also be great for those occasional brunch parties.


Cornmeal Molasses Pancakes
adapted from Joy the Baker
makes about 16 pancakes

1 large egg
1 1/4 cup buttermilk
1 tablespoon molasses ( I use Grandma's molasses)

1 teaspoon vanilla extract
1/4 cup unsalted butter, softened
1 cup all-purpose flour
1/2 teaspoon salt
1/2 teaspoon baking soda
2 teaspoons baking powder
1/2 cup yellow cornmeal


1. Melt your butter in a small saucepan or double boiler, and cool slightly.

2. Whisk together egg, buttermilk, molasses, vanilla extract, and melted butter in a small bowl.

3. In a medium bowl, sift together flour, salt, baking soda, and baking powder (I also whisked to ensure it's all mixed).

4. Add egg mixture to flour mixture, and stir with a wooden spoon to combine until just mixed. Don't worry if the batter is a bit lumpy, that's normal.


5. Drop two small spoonfuls of batter onto a hot, greased skillet.

6. When you see the edges are turning brown and there are bubbles on top, flip that pancake.


Pancakes are also a bit time consuming since you can only do one or two at a time, so I always keep a plate warm in the oven to place the finished pancakes until everything is ready. About 200 degrees is great.

We ate this with Maine's maple syrup, but they were also great with just butter. Love the crunch of the cornmeal!